In Microsoft Windows, ReadyBoost is a software feature that speeds up the system by storing application files and data as cache in a USB drive. This is beneficial in case the system is running a slow hard drive. The ReadyBoost works with USB drives, SD cards, and CF cards. However, it may not be able to deliver considerable performance in the case of newer hardware. So, if you’re stuck with an older hardware, you can speed up Windows using ReadyBoost and USB drive.
Microsoft first introduced functionality to use an USB drive or SD card as a memory cache in Windows Vista in the form of a feature known as ReadyBoost. The feature was also inherited to Windows 7 and later, but with the ability to configure more than one USB drive for ReadyBoost.
How ReadyBoost works?
Now, ReadyBoost is a feature that allows the system to store required data in an external media for some time. The real driving force behind is SuperFetch – a disk cache management system in Windows that speeds up your system. It is another goodie which came with Windows Vista. However, a precursor called PreFetcher existed on Windows XP.
SuperFetch runs some algorithms to analyze your habits and automatically loads the relevant data to the main memory (RAM). For instance, if Chrome is the first application you use when you start your PC, SuperFetch will load Chrome files on the RAM and reduce the launch time.
Mostly, SuperFetch creates a temporary cache on the main memory itself. Thus, using ReadyBoost can be an advantage if your system is low on RAM. Also, the drive’s mechanical arm does contribute to degraded performance.
SupeFetch works with ReadyBoost to speed up Windows and decides what things should go into ReadyBoost cache on your USB drive and eventually into the RAM. It copies data to the cache file stored in the USB drive’s root folder.
Now, there is catch, the cache so created is used only in the case of non-sequential operations. When it comes to sequential operations, SuperFetch uses the files on the hard drive instead. So, ReadyBoost only comes into action when a performance improvement is possible. This also means you can pull off the USB stick anytime you want, as original files are present on the hard drive.
How to speed up Windows using ReadyBoost?
As mentioned earlier, you can use a USB drive, SD card or a CF card to enhance the performance of your Windows 10 operating system.
In the case of SD cards, please keep in mind that you use the internal SD card reader present on your machine. The external card reader may not be as effective as the internal one. Also, it would be better if you format your USB drive or SD card before setting up ReadyBoost. However, it’s completely optional.
Now, here are the steps to set up ReadyBoost on your USB drive and speed up Windows 10 (for previous versions the options may slightly differ):
- Connect the USB drive to your Windows 10 PC.
- Go to My Computer or This PC.
- Now, right-click your USB drive to open the context menu and select Properties.
- Under the ReadyBoost tab, you can allocate space for the ReadyBoost feature or use the complete USB drive.
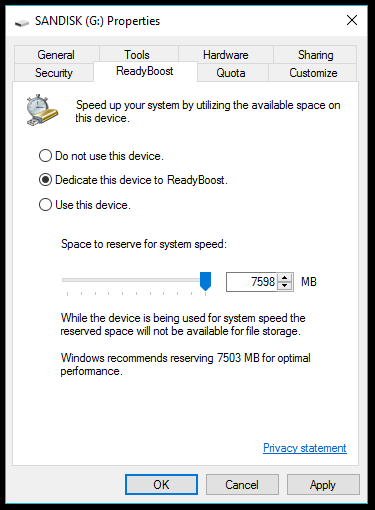
- Select Dedicate this device to ReadyBoost if you won’t be using the USB drive for any other purpose. Otherwise, select Use this device radio button and use the slider to reserve space for the feature.
- Click OK to finish. Windows will take some time to configure the USB drive.
So, this way you can speed up Windows using ReadyBoost if you’re low on resources. You might observe some benefits of the feature but they largely depend on people’s usage habits and may differ from machine to machine.
How to monitor Readyboost
You can keep an eye on the performance numbers of Readyboost cache speeding up your Windows system. Follow the steps to add ReadyBoost in Windows Performance Monitor:
- Open the Start Menu on Windows and search for Performance Monitor. You can find the same option by visiting This PC (right-click)>Manage>Performance>Monitoring Tools> Performance Monitor.
- Once the window opens, click Performance Monitor option on the left-pane.
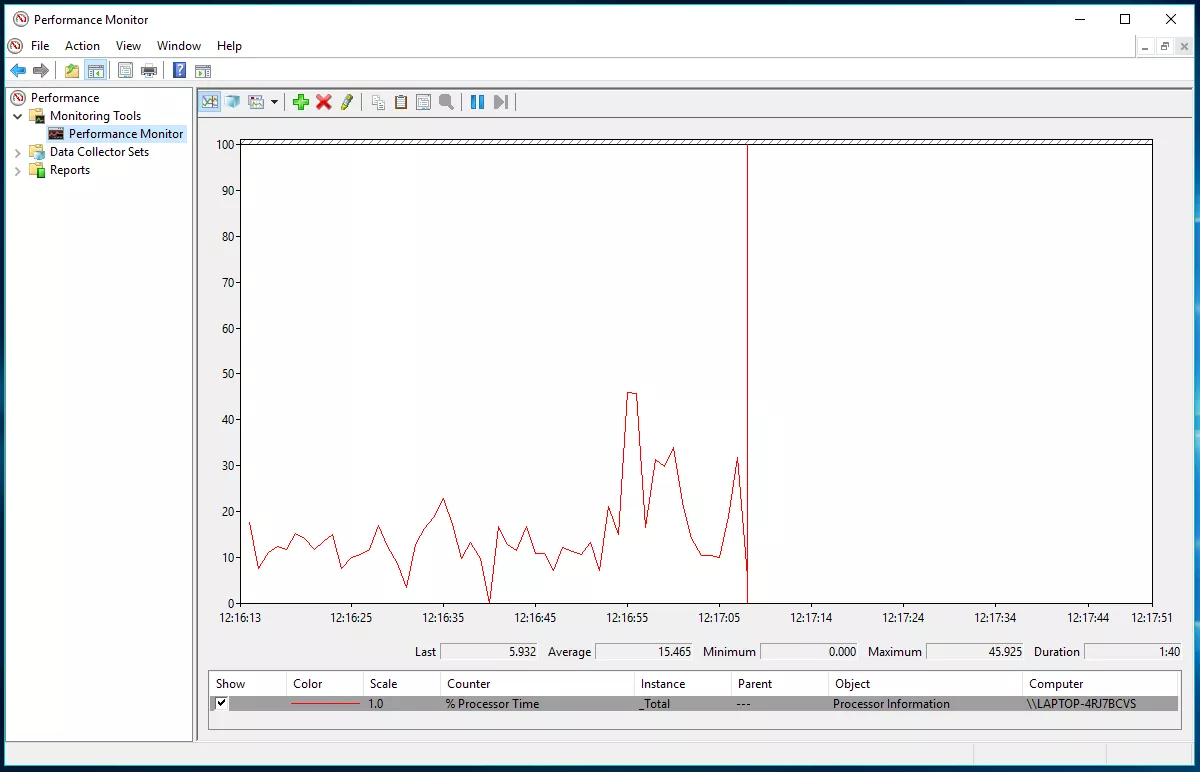
- To add ReadyBoost counter to the performance monitor, click the green-colored + button.
- On the Add Counters window, scroll down and select ReadyBoost cache from the list of available counters.
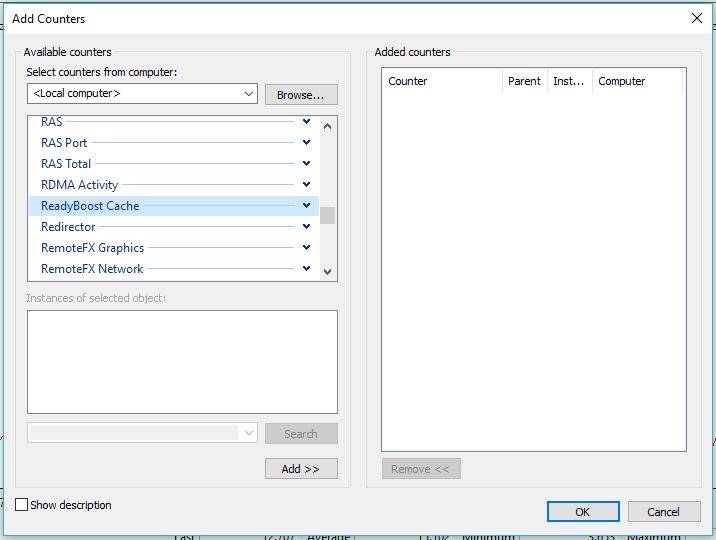
- Click Add to make an entry in the list of added counters.
- Click OK to finish and save the changes.
Now, you will be able to see the statistics of the ReadyBoost cache in use. However, the Performance Monitor won’t be able to give you the actual feel of the feature in action. Also, you will have to follow the same process every time to see the performance details.
If you like So share us for more exiting Tricks and Tips 😀
Royale Hacking